Sunday, December 27, 2009

Howto setup Remote Desktop over Internet, Dynamic DNS

Recently, I was helping a few friends to remote desktop into their machines over the internet, and was annoyed at the amount of work and explaining required, so I'm putting together this simple guide to ease the process of me having to explain everything, and hopefully get the most complete and simple guide out there on the web. 

***Disclaimer***
This guide will show you how to connect to your computer using windows remote desktop and port 3389. I do NOT recommend this if you are worried about security. I may add other options later to this guide.
******
 Essentially, this guide will show you how to remote desktop into your computer over the internet. First, before you go through all of the trouble, let me inform you of Log Me In which essentially does the same thing... with better encryption and the free version has many useful features, and works on more operating systems.  However, this tutorial also covers mapping a free (or purchased) hostname to dynamic DNS, which has other benefits such as setting up your own webserver.

There are six simple steps that need to be done to achieve remote desktop over the internet:
1.  Ensure your Operating System has the capability.
2.  Enable remote desktop.
3. Ensure the host's firewall is properly configured.
4. Setup port forwarding on the host router.
5. Enabling Internet access.
6.  If you have a dynamic IP, setup DDNS (dynamic DNS)
7. Configure automatic DDNS updates.

First, lets take a look at the most common setup you will be working with:
Essentially, you will be attempting to remote desktop to a remote computer through your (typically) home router, to the internet, through the remote router, and to the remote desktop.
Operating System Compatibility
First you need to ensure that your operating system supports remote desktop (aka terminal services).  The desktop versions of the Windows operating system support remote desktop, as well as many of more feature-heavy versions of windows, such as Ultimate.  Windows Home Edition does not support remote desktop as a server. However, Windows HE does have a Remote Desktop Client, which enables it to connect to a remote desktop.  As well, almost all linux distros have the ability to connect to remote desktop sessions.
Enabling Remote Desktop
Enabling remote desktop is quite simple.  The screenshot below shows how to enable remote desktop on Windows 7, which should be very similar to Windows Vista.  Essentially, right-click on My Computer, select properties, and look for "Remote".
Then, just enable remote desktop.  Another important step to take is to enable the appropriate users access to remote desktop.  By default, the administrator already has access to remote desktop.  Your computer is now set up to receive remote desktop connections!  If you have another computer in the same LAN, you can go ahead and test this to see if this works.. if not, you will have to complete the next step!
Host Firewall Configuration
If you are unable to connect, you may have a problem with your firewall.  In Windows, these settings should be found in the control panel, under "System and Security".  Ensure that "Remote Desktop" is enabled and allowed.
Port Forwarding on the Host Router
However, enabling remote desktop on the host machine will be very unproductive (get it?) without enabling port forwarding on your router.  Port forwarding essentially tells your router that when an external request is made for port 3389 (the remote desktop port) it should forward that request to a certain IP Address, specifically the one that is hosting remote desktop.  Connecting to your router to make this configuration is quite easy.  Look on your router itself.. there should be a default IP address (something like 192.168.1.1 or 10.10.10.1) on the router for you to use to connect.  As well, there should be a default username and password.  Next, direct your browser there by typing http://[IP ADDRESS], i.e. http://192.168.0.1 and logging in using the username and password.  (Hint: if you are still using your default username and password I highly recommend you change it. It is very insecure.)  Once you log on, you will need to go through your menus until you find something called "Port Forwarding".  Once you find that, you will need to forward port 3389 to your computer, so you can connect to it from a remote machine.
However, to do so you need to determine the IP address of your computer.  The easiest way to do that is to run ipconfig on your computer. To do so, hit the start button and (on Windows XP and earlier, select Run) type cmd.exe in the command prompt, and hit enter.  This should bring up a black command command prompt.  Type "ipconfig" into the command prompt and hit enter.  Next, look for Local Area Connection, and IP address, or IPv4 address.  This  is the address you will enter into the port forwarding address on your router.   

Next you need to ensure that remote desktop is working in the LAN before we attempt to connect over the internet. You will need another computer in the same LAN (behind the same router) to attempt to connect to the computer.  To do so, you will once again bring up the run prompt, (or in Windows Vista and 7 in the search box) type mstsc and press enter.  This will bring up a window that looks similar to the one shown 
below.  In the computer box, you need to enter the IP address of the remote computer you wish connect to.  After you enter the IP address and hit connect, you will be prompted to enter your username and password to connect.  After you login, you should see your desktop and be able to interact with it remotely!
Next, we need to make sure we can replicate this effect over the internet.


Setting up Internet Access
To access your computer over the internet you need to have some way to find your computer in the vast maze of the internet.  To do this you need to know your external IP address.  Just like your router assigns IP addresses to your computers, you internet provider assigns IP addresses to all of it's subscribers.  To access your computer, you need to know your external IP address.  The simplest way to find your external IP address is to visit IP Chicken where your IP address will be shown.  However, many providers, for various reasons, give out dynamic ip addresses, which will change periodically, which will render your ability to connect to your computer limited to until your IP address changes.  Fortunately, there is a way to rectify the situation.
Setting up Dynamic DNS
To rectify a dynamic DNS problem, you need an easy way to link your changing IP address to an unchanging address.  This can be done with a web address using dynamic dns. (DNS is a service that converts and IP address (77.200.65.70 for example) to a web address).  To do this, you need a dynamic dns service such as DynDNS.  DynDNS is the most popular service for this, but there are others.  Once you have an account at DynDNS, you can add a host, and it will allow you to choose from several options for a hostname.  For example, my hostname from dynDNS is http://deranjer.is-a-geek.com.

Automatically updating Dynamic DNS
After setting up your hostname, you need to set up a way for your IP updates to reach dynDNS.  This is done one of two ways.  You can run an updater that runs on your computer and sends updates to dynDNS, or you can set up dynDNS to run on your router.  Most modern routers have an option for setting up a dynamic IP updater directly from the router. Just choose your service, enter your username and password, and you should be good to go.  If your router does not support this, download the dynamic IP updater program and run that on your computer, and that should keep it updated.  Now you should be able to remote desktop into your home computer using your website address (sometimes it takes a little while for the DNS updates to cascade all the way down, so if you are unable to reach it sometimes just waiting will clear that problem up).

This concludes the guide for remote desktop over Internet.  Happy remote desktoping!

Monday, November 9, 2009

Example Preseed file tutorial for Debian Lenny PXEboot Server

 The Default File
The next step for our PXE Server (for the previous step see here) is to make an option for an automated deployment.  This is especially useful in a production environment as you can network boot a computer, feed the appropriate options in the command line and walk away, with entire confidence that the OS will install flawlessly.  Now for the preseed file to work correctly the default file needs to be edited (again, see here). 

If you inspect the file above you will notice the line that is used for the preseed.cfg file, which must be one line, but is broken in this example for formatting. :
LABEL lenny_i386_autoinstall kernel debian/lenny/i386/linux append ramdisk_size=14984 locale=en_US console-setup/layoutcode=en_US netcfg/wireless_wep= netcfg/choose_interface=eth0 netcfg/get_hostname=DebianServer netcfg/get_domain= console-keymaps-at/keymap=us url=http://IP ADDRESS/pxescripts/preseed.cfg initrd=debian/lenny/i386/initrd.gz --
Alright, lets break a little bit of this down.  In order for our auto installation scheme to work, there need to be some options passed on directly to the kernel, and lets go over a few of them.
1. ramdisk_size - stores some execution space in the RAM, speeds things up.
2. locale=en_US and console-setup/layoutcode=en_US - setting US English as the default language
3. netcfg/wireless_wep - I believe this is for a wireless password, but not entirely sure.
4. netcfg/choose_interface - This allows you to chose the network interface that will be used
5. netcfg/get_hostname - allows you to set the hostname of the machine.
6. netcfg/get_domain - allows you to set the domain of the computer
7. console-keymaps-at/keymap - allows you to set the keyboard mapping
8. url=http://IP ADDRESS/PATH/preseed.cfg - specifies where the preseed.cfg file can be found.
Now you will notice that many of these are defined in the default file... if I wasn't lazy, and this was a work environment, it would be better to manually enter at least one of these, namely netcfg/get_hostname.  This way I would not have to go back and change the hostname for almost all of the machines... a big time saver.  As well, you'll notice that to fetch the preseed.cfg file I used a http:// address.. I believe a ftp:// and file:// prefix will work as well.  Now, the reason these options all need to be passed on directly to the kernel is because many of these options are asked before the networking is configured.  So until the machines gets an IP address during installation (which is after the language is decided) the preseed.cfg file is not available to fill in the answers... so these options need to be directly passed onto the kernel.
The Preseed.cfg File


Now I will explain some of the more cryptic/hard to grasp elements of the preseed.cfg file
The first few lines set the installer language and keyboard layout... I don't think those are necessary, they should have passed directly to the kernel.  Next, I am telling the installer to automatically choose the interface to use.  The next few lines are not necessary, as we passed those on directly to the kernel.  The mirror settings section is very important, especially if (like me) you decided to cache (using apt-cache or apt-mirror) files to ease bandwidth traffic.  The first two lines select the country, and the directory string sets the distribution.  The proxy string is the key for making sure the files are pulled from your personal apt-cache.  As you can see, I'm pulling it from my web server, with the port for my apt-cache defined. Next, the suite specifies the version of the linux distro.  The partitioning can be difficult to set up, especially if your machines have one, two or more hard drives.  If the machine only has one hard drive, specifying a hard drive is not necessary.  Since one of my testing machines has two hard drives, I added the "d-i partman-auto/disk string /dev/hda", which specifies that the installer should use the first hard disk.  Next, after selecting lvm for the method, you can choose one of the pre-defined partitioning schemes.  The options are:
# - atomic: all files in one partition
# - home:   separate /home partition
# - multi:  separate /home, /usr, /var, and /tmp partitions
As you can see, I chose the atomic method.  For improved performance, you may want to choose one of the other methods.
Next, you can set up the user accounts and passwords.  The first thing you can do is set the root password.  In the example, the password is sent in clear test (it is masked in the example), but I certainly recommend you send the password as a MD5 hash.  To generate a MD5 hash, just run the following command:
$echo "password" | mkpasswd -s -H MD5
Next, you can choose the package that you want to install.  I chose the standard desktop install.
Essentially, that covers the trickier parts of the preseed.cfg file.  Happy automated installing!

Monday, November 2, 2009

Tutorial, Howto setup Debian Lenny Linux PXEboot Server with DD-WRT DHCP options

Recently, I decided it was time to drop the CD/DVD installs of linux and move to something easier and quicker (although that is debateable).  As well, a few of my computers have no disc drive and switching disc drives from computer to computer gets very old very quickly.  As well, if a computer has a slimline drive opening the case to temporarily add a CD/DVD drive is too much work.  I finally decided to install a PXE server on my debian box, to allow network booting. Networking booting is an extremely handy way to install operating systems, boot to recovery tools, ect.
 Installing and Configuring a Tftp Server
The first thing we need to do is install a tftp server. The tftp server will be used to serve the files to the computer that is booting up. To install a tftpd server on debian we do this from the command prompt:
$sudo apt-get install tftpd-hpa
When you install the tftpd-hpa server, a few dialogs should come up. Just make sure you set the correct path for the server root. The newest version of tftpd-hpa is different than the older version, but since I'm running the cutting edge, I will be covering the newest version. After configuration, we will need to make sure the config file is setup correctly. If you ever need to reconfigure the file just run the following command:
$ sudo dpkg-reconfigure tftpd-hpa
Now to take a look at the config file:
$sudo nano /etc/default/tftpd-hpa 
The config file should appear as follows: Ensure that the "TFTP_DIRECTORY = /var/lib/tftpboot" directory is the correct path to your tftpboot directory. Everything else should be correct.
 Creating the Directory Structure/Downloading the Files
Now we need to create the directory structure necessary for PXEboot.  First, create the directory /var/lib/tftpboot.  Next we will be creating several files and directories.  When we are finished, the directory structure will look as follows. 

Next, we need to download the appropriate initrd.gz, linux, and pxelinux.0 files, which can be found several places.. such as here.  In the newest version of debian PXEboot, they have a GUI bootable version, however I decided to stick with a text boot version, and this tutorial will be about that option.  Once the initrd.gz, linux, and pxelinux.0 files have downloaded, put them in the appropriate folders.  In my configuration, I also have a xen folder for booting and installing a xen server, but that is not covered here.  If you are interested, the xen boot option should be available for download from the download link above.
 Creating the Menus and Defining Options
 Next we need to create the default and the boot.txt files.  The boot.txt file is the menu that shows up when you boot the computer.. in this example it will be a text only file.  The configuration of the file is extremely simple.  The only part you need to pay close attention to is the exact wording of the boot options.    
Next, we need to create the default file, which links to the boot.txt file.  The default file should look something like this:


The text box is not wrapped, to prove a point. Everything entered after the append option must be on one line, otherwise it will not work.  The labels in the default file must match the labels in the boot.txt as that is how the files are linked.  Obviously, you can add new labels to the default file, as long as you match it with the boot file.  I added the lenny_i386_autoinstall label, which will hopefully be covered later.  The DISPLAY option tells the PXEboot server what file to display for the menu.  The DEFAULT option tells the PXEboot server which label is the default label, which works well in conjunction with the TIMEOUT option.  The TIMEOUT option is by default zero (no time limit) but in my configuration I set a timeout of 40 seconds, which means that in 40 seconds of no activity, the DEFAULT option will be booted.
DHCP Server Options
However, there is still one piece of the puzzle missing.  You need a network booted machine to know where to look for the PXEboot server.  This sort of configuration will need to be passed to the machine via DHCP options.  In this instance, I will be using a router with dd-wrt installed to pass the DHCP options to the client.  Since dd-wrt is linux based, the command should be quite similar if you are using a linux DHCP server.  With dd-wrt make sure that you are using DNSMasq for DHCP, which can be found directly under the setup tab.


Next, you will need to add the option that will tell the client where to look for the server and what server to look for when network booting.  The option is configured under the DNSMasq box (not the DHCPd option, which may appear more relevant).  The format for the dhcp-boot option is: dhcp-boot=filename,servername,ipaddress


The filname option is what the name of the file is that the PXEclient should look for... in this case, that file is pxelinux.0.  The servername is not necessary... as you can see I left it out.  However, the commas are necessary.

Troubleshooting
For troubleshooting, I recommend you install Wireshark to sniff network traffic.  It is a very useful tool.  Next, a few common troubleshooting methods for narrowing down the problem.
Ensure the TFTP server is working.  If your client is unable to find the pxelinux.0 file, make sure you can tftp files from any machine (even from the machine that your tftp server is installed on).  This error could be cause by an incorrect tftp boot path, or the tftp server is not running.
Ensure that your network card/BIOS is PXEbootable.  An obvious problem, sometimes upgrading the BIOS will solve this.
 If all else fails, sniff the network traffic.  Use Wireshark to sniff the network traffic, this will help troubleshoot problems.
Hopefully soon I will cover using a preseed.cfg file to do an automated network boot and install. 

Sunday, October 25, 2009

Google Wave First Look and Tutorial

Well I recently received my Google Wave account, and have been busy having fun with it ever since. Since Google Wave is actually getting a lot of press (which is unusual for a very beta tech product) there is actually a rather large public community on Google Wave, busily testing all of the features. Since I did get my invite, I thought I would share with everyone a little bit of how Google Wave works.

First off, the UI looks quite beautiful, and has many options for reorganization to maximize the space you have available to you. This will come very much in handy later, as you will see. Shown below is the default view you will see when logging into Google Wave.


The far left panes shows your "Contacts" and "Navigation" pane.  Currently, the contacts listed in the pane are all "extension" contacts, more about that later.  The "Navigation" pane is rather self-explanatory, and is similar to the gmail navigation pane. The "Inbox" is somewhat self-explanatory, and works in a similar way to an email inbox, yet also adds the functionality of an RSS feed of sorts. Notice the number highlighted in green under the time for each wave.  This is the number of unread messages in each wave.  When viewing the wave you will see wavelets/blips/messages that will either have a green bar on the left hand side, or they will be encircled in green.  These are the unread messages.  Clicking on them will mark them as read.   The view to the far right is the "Message" view, which shows all of the wavelets and blips in the wave.  Essentially, a wavelet is a threaded conversation inside of a wave, and a blip is an individual "post".  For an in-depth terminology reference see here. The nice thing about the UI is its ability to be reorganized. For example, reading a very large, in-depth wave will become tiresome if you have to read it all in a tiny window on the right hand side. So, as shown below, you can minimize or hide windows.  Notice the Inbox, Navigation and Contacts windows are minimized at the top of Google Wave.

There are essentially two types of waves: public waves and private waves.  To see a list of public waves, go to your search bar and type with:public which will bring up a massive list of public waves.  At this current point in time, public waves are a massive mess, as there is no easy way to manage/garden them.  It is akin to a massive global chat with embedded images/gadgets/bots.  I believe the real potential for Wave is with private waves, which are waves that are invite only.  This allows you to invite only people you trust, so that you can be productive inside of a wave.  As well, as it currently stands, if you click on a public wave, it will automatically be joined to your inbox, and with a massive amount of people constantly adding posts, it becomes a rather large mess.
If you look at the image above, you will notice that there is a extension added to the wave called "ClarkPoint".  This is a very handy application, as it allows you and anyone you add to your wave join in an instant conference call.. using VOIP.  All each of you need to do is click on "Group Call" and you will instantly be in a conference call.  As an added benefit of being in a wave.. all of you will be able to add notes simultaneously, in real time.  A very big benefit indeed.
Next, lets cover extensions/bots/gadgets.
Gadgets
Gadgets are essentially applications that run inside of a wave.  For example, lets say you wanted to see if everyone in you wave wanted to go on a trip.  You could insert a "Yes/No/Maybe" gadget.  This would allow everyone in the wave to cast their vote.  You could also add a map gadget, and everyone could see you (in real time) zoom into and out of the map, and add markers, and they could do so as well (in real-time).
 Bots
Bots are added as users to your contacts, and you can add them to your wave, and (as far as I know) affect the entire wave.  For example, you can add a bot called "cartoonybot@appspot.com" and all of your conversations (the ones that occur after you add the bot) will be converted to speech bubbles, as shown below.     
Another bot, called py-robot@appspot.com, integrates wolfram alpha (for more information on wolfram alpha click here) data into a Google Wave.  To use this functionality, do a wolfram alpha search surrounded by brackets "[]" and py-robot will automatically post directly under you with the results of your search... very impressive.  As it is still in beta, it does not have all of the functionality of wolfram alpha.
Wave Editing and Navigation
At this point in waves, everyone can edit anyone's blips.  Obviously, this is a serious problem, and hopefully one that will be addressed in a new version.  Essentially, to reply to a wave with a new post at the bottom of the wave, hit the reply button on the upper menu bar, shown below.  The next button, the playback button, will playback sequentially everything that happened on the wave.  The archive button will archive the wave thereby removing it from your inbox.  The mute button will also remove the wave from the inbox, but make it available for searching.  The spam, read, and unread buttons are all features of email, and operate the same way.  The trash can will trash the wave.  The move to button will move the wave to a folder of your choice.
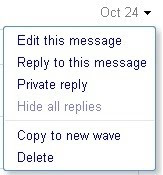
 When editing a wave, if you want to reply directly to another post, you can click on the arrow at the far right to drop down options and select reply to this message.  Private reply allows you to reply only to the message's author.  Clicking "Reply to this message" will reply to that message, and not at the end of the wave. 
Inbox and Wave Management Theories
I believe that the Wave "Inbox" will be completely unlike an email "Inbox".  I think that the amount of information that Wave will generate will explode making the classic inbox model unstable.  I am positive that due the extreme flexibility of the Wave platform many websites will use that for their forum, in at least some capacity.  Obviously, if the forum is being used heavily, you do not want that wave popping to the top of your inbox every time someone changes or adds to the wave.  You would need a way to specify notifications, or at least have a way to filter the wave to get the information you need.  I believe the trend that will emerge, (and believe me, not a new trend really) will be a search based inbox.  For example, you would create custom queries for different inbox views and switch through those views as needed. Some examples are with:me and with:public, for a full list, see here.
Currently, public waves are massive beasts that have you scrolling through hundreds of posts, and it is possible for dozens of those posts all throughout the wave to be edited at the same time.  This forces you to scroll thorough the page each time to find the specific thread you were looking for, in a vastly changing, confusing mess.  There needs to be a way to at least jump directly from unread blip to blip.. history will technically perform this, but at this point in time is much to slow and unwieldy to use in this manner. Perhaps a tag-cloud bot could be written to jump to certain parts of the wave... I think that could be something very useful.
Another difficulty encountered is chat management.  I was testing out a conference call gadget, (add it to the wave and all of the members can click add to conversation and the flash based application will use the microphone and camera to connect all the users) and someone chatted to me asking where I found the gadget.  The conversation went as follows:


hey.. sry.. mike not on right now lol Where do I get this gadget? THanks and you just dropped itin hear? one sec.. let me look it up.. searched the web to find it. I found it. www.ribbit.com/wave Thanks though. Click on teh Green button to add by URL.. should add it.. oh okay.. cool.. there are some other ones like it... they work well too.. no problem. yeah cya. cool see ya.

Obviously, we were both typing in the same space, deleting some of our own text, some of the other person's text, and something that may have made sense to us at the time is now a jumble of unusable text.  Using playback is not an option to figure this out, as it is not sensitive enough to catch all of our little edits.  This is something that needs to be worked out.
Overall, I am very excited for the potential that Google Wave holds. I'm looking forward to the community to develop Google Wave into a very valuable product.
[edit]  Now you can check out my YouTube video covering the basics of Google Wave!


Saturday, October 24, 2009

Exchange 2007 Installation on Windows Server 2008 (Part 1)

Recently, I decided to install Exchange 2007 on a VM for training purposes.  The setup was as follows:
1. Virtualbox - for virtualizing two machines.
2. Windows Server 2003 - AD/DNS and Exchange Client.
3. Windows Server 2008 - Exchange 2007
The networking for these machines actually was really difficult and involved much more work than should have.  My plan was to have the machined network be on its own internal subnet, yet have access to the internet via a bridged interface.  However, I was unable to easily get the Virtualbox host interface to easily give 192 addresses to the internal VM's while maintaining an external 10 dot IP address. In the end (against my better judgment) I gave the internal VM's a 10 dot ip address and attached another nick to the host machine and bridged that interface with the VM's.  Needless to say the VM's were completely updated and locked down as soon as possible. On my Server 2003 VM I ran dcpromo and configured AD and DNS. The domain I named "test.local", an oversight considering my eventual plan was for Exchange to accept and send mail to external addresses.  Next I installed Windows Server 2008. (Note: With Virtualbox and Exchange 2007 do not choose dynamically expanding storage. Exchange will complain about not having enough mailbox space.) Once Server 2008 was installed and joined to the domain, it was time to install the pre-requisites for Exchange.  The nice part about the Exchange install (and new Microsoft product installations in general) is that Microsoft has become "Information heavy".  Error messages have (in general)  become much more detailed and often contain directions and links to fixing the problem.  However the problem often arises that the messages are much more verbose, and yet still as worthless. If you did not know the prereq's for an exchange install when you insert the install disc it has a list for you to follow, as shown below.

On a lot of servers, .Net framework and Microsoft Management Console will already be installed.  Next, Powershell will need to be installed.  Powershell is a very handy server management tool.  Windows is apparently going the way of linux for the ability to manage server without wasting the server's resources by forcing it to display a GUI.  

After installing Powershell you should be all set for starting the actual exchange install.  However, first, Exchange 2007 will test to make sure that your domain passes all of the requirements for installation. For more information follow Microsoft's requirement list, found here.  When the Exchange installer ran on my server, it discovered I had unmet requirements.  The requirements I needed were IIS.  I installed the following:
  • The default IIS 7 package
  • IIS 6 Managment Tools
  • Static and Dynamic Compression
  • Basic and Digest Authentication    
After installing the following components, the Exchange install started without any difficulties. The Exchange install took a rather large amount of time (over 40 minutes).  Everything appeared to install without incident.  After creating a snapshot of the hard drive, I rebooted the server. Next, I ran the Exchange Management console. Upon loading, Exchange loads the Finalize Deployment Wizard.  The next recommended thing to do is to run the best practices wizard, to make sure everything is working correctly.  This option is found in the toolbox.  The wizard will initially look for updates before running, and once it is updated it will direct you to the welcome screen.  From the welcome screen it will have you select an AD server to connect to.  Considering I only had one, it was a rather easy choice.   It gives an estimated time of one minute, however in my case a few seconds was all that was needed. Next you come to the main page, which has several options.  First you can select the scope of the scan... for me I obviously chose the only Exchange server I had running.

Next, I could chose from several different types of scans.  I chose the Health Check, which I believe is something you should run the instant you add an Exchange server.  If this was a production environment, I would perform the Performance Baseline Check as well to have something to compare future performance against.


The Health Check took about 3 minutes to complete, and then gave me an option to view the report, which I did.  Immediately, the report showed any critical errors.  I had one critical error, namely "Offline address book definition is missing."  To fix the error, I performed the following.  I went to Server Configuration -> Mailbox -> Mailbox Database -> Properties -> Client Settings.  From there it will show that the "Offline Address Book" is missing.  Just click browse and select an offline address book.  
I am unsure why this error occurred, and why this was not able to install correctly without forcing me to correct it manually.
Now I had to add some mailboxes.  As far as I can tell in Exchange 2007, adding users in active directory does not add them to Exchange 2007, so I added them under Recipient Configuration -> Mailbox -> New Mailbox.  Adding them here would add them in Active Directory, and would give them an Exchange mailbox.  Quick and easy... I am not sure why adding them in Active Directory does not add them automatically to Exchange.  I believe this should be a feature.

Now, I was ready to begin testing.  The first thing I did was forward port 443 to my exchange machine, to allow external access to Outlook Web Access (OWA).  
I tested this from a remote machine, and this worked fine, I was able to successfully log in and send and receive emails. (Note: To run in "full blown" mode, OWA requires Internet Explorer.  Firefox (and I assume other browsers) can run OWA in "Lite" mode.  I recommend using IE, as the web interface is quite beautiful when using IE, as shown below.

One thing I noticed (and this I did not know about) was that if you have a Sharepoint server you can access the documents using the "Documents" tab in OWA.  Very handy feature, if my Sharepoint Server was up and running I would have tested that feature, as I'm curious as to how exactly that works.  Apparently you are also able to access Windows File Shares from that interface.
Next, I was able to install Outlook 2003 on my DC.  I started up Outlook 2003, specified that I was connecting to an Exchange server and everything set up correctly, and worked excellently right out of the box, as shown below. 

At this point in time I was quite satisfied that at least Exchange was working with minimal amount of work on my part.  Then, after getting Outlook 2003 working, I decided to move to Outlook 2007.  
I installed Outlook 2007 on the DC as well, and when I started the program, it found my user name in the Exchange Mailboxes, and automatically filled in my user name and password. I clicked next, and then it prompted me enter a password to connect to the Exchange Server.  However, no matter what combination of user names, passwords, and domains, I was unable to log on.  So I finally clicked "cancel", and then Outlook displayed the error "The connection to Microsoft Exchange is unavailable. 

Outlook must be online and connected to complete this action."  After clicking "okay" another dialog box comes up.  That dialog box has you resolve the name for the server.


After making sure everything was correct, I clicked "Check Name", however Outlook was unable to resolve the name.  Nslookup queries proved successful, and considering that Outlook 2003 worked fine, this was an interesting error.
Next, I attempted to manually connect to the exchange server.  However, this also proved impossible.
My next post will cover everything that was attempted to resolve the problem, and more about Exchange Server 2007.

Wednesday, October 7, 2009

Switching from Hamachi to NeoRouter

Due to the problems I kept on having with my Windows 7 laptop Hamachi connecting to my Debian Server Hamachi, I have switched VPN solutions.  So far I have been pleasantly surprised... it has all of the same features of Hamachi (as far as I can tell) and a few more nice features of it's own.  For gaming, hamachi, unfortunately, was slightly weak.  Trying to play a CS:S game would fail, as the addresses would not all be class C address.  However, with NeoRouter, the IP's are all class C addresses (configurable), so this should not be a problem.

However, NeoRouter has a few more configuration steps that need to be taken for it to be set up, compared to Hamachi.  For one thing, you must install a server version of NeoRouter, in addition to all of the client versions.  Fortunately, NeoRouter has a Linux version in the form of a .deb package for easy installation on Debian.  Running the server install on Debian does not give you any configuration options... once it's installed it's installed and running.  Interestingly enough, you are unable to edit the server configuration at at all from a linux machine.. you must have a windows machine... in the same LAN (according to their documentation... you should be able to do it externally.. just have to prep your firewall first).  However, once you open the server configuration (shown below), you can edit the options.  The small screen on the right is the client view.  To access the server options, you need to go to File -> Options and then log on to server.  This is done by entering the username and password that you use to log onto your linux box.  The logon-to value is the IP address of the linux box.  That will bring up the screen shown below.  The logon-to value is the name of the "Network" that you created (The first time you logon this will be the IP address of the linux box).  The IP address box will show the IP address of the server, and below the port number (32976 is default).


Next, you are able to add user accounts (as shown below).  These are user accounts that your friends (or you) can use to log on.  The value that these accounts add is that you can assign "User" vs "Administrator" accounts, and give your friends user account credentials to sign onto your network.


The computers tab (shown below) helps regulate access permissions that users have to certain computers.  You can add users and then turn the firewall on for that user, and add or delete access to certain parts/ports on your computers... very nice, and it has a granularity that Hamachi does not.


The connections tab allows you to set P2P connection settings.  This is a very useful feature, as you can tell the computers in the same network to create direct UDP connections.  This should allow for faster connection speeds, as you are able to go directly from peer to peer without interacting with the server. As well, (this is a guess) you may be able to continue utilizing NeoRouter even if the server goes down (as long as the UDP connection stays up, once the UDP connection is lost, you will need the server).

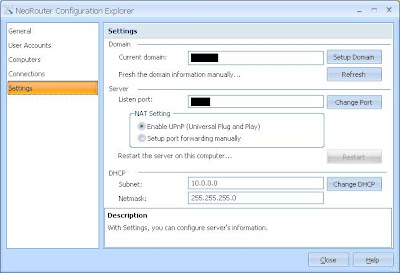
Lastly is the settings dialog (shown below).  The "Current domain" shows what domain you are currently logged onto. This is the setting that you defined when you logged on by what you entered into the "log into" box.  When you first configure the server, you enter the IP address of the server, and you configure and join the network that way.


 However, once you leave the LAN, you would have to enter your external IP address.  This obviously becomes very difficult if you have a dynamic IP address.. you would first have to find your IP address before you entered it into the "log-on" box.  As well, every time that IP address changed you would have to re-enter it.  The domain option changes all this.  When you enter a domain name your NeoRouter client sends an https request to the NeoRouter servers (not your server) and checks to see what IP is registered to that domain... so essentially NeoRouter acts as a DDNS server for your VPN.  This is one step removed from Hamachi, which also sets up the connections... with NeoRouter your server still handles connections, but your clients contact NeoRouter to find the server.  However, I actually have a DDNS account, so I can enter my domain name and I will always be able to find my dynamic IP.


Now I'm going to explain exactly how this works, to the best of my ability.. hopefully this is accurate.  The server will receive all requests to join your "domain", (sometimes using NeoRouter's DDNS service) and will then (by default) connect each client directly using UDP, after assigning them all IP addresses.  The clients are then able to connect directly as a VPN.  If a client loses connection it will again contact the server.

The only other thing left to test is NeoRouter's ability as a service.  With Hamachi, you did not have to be logged on to Windows to use Hamachi, we will see if NeoRouter is the same way.

Hope that helps some of you if you wanted a better choice than Hamachi.

Thursday, October 1, 2009

Windows XP to Debian Server Switch

Recently, I decided to switch from Windows XP to Debian, and further more decided to go cutting (read: bleeding) edge and install Debian Squeeze (Debian 6), which is still in the "unstable" phase. At the bottom of this post, I have a Youtube link to a video detailing the installation.

The list of programs that I had on my windows "server" was quite normal, nothing extremely special:
1. Subsonic - for streaming music\video (with my internet connection the video really wasn't practical.

2. uTorrent - I'm kind of a packrat, and I have almost all of the newest versions of software in RSS feeds (Check out SARDU antivirus, UBCD, etc.. I have RSS feeds for all that software so I can download the newest version automatically). As well, I for some reason need to have the newest releases for my favorite linux distro's.. you guessed it, RSS feeds.

3. Hamachi - For VPN, because I need a better router before I will implement OpenVPN, don't have enough NVRAM in my router for it to work. Feel free to donate to help me buy a better router :D.

4. Apache - hosts my web server, which hosts my freemind maps, and other test environments.

5. Freemind - For creating the mindmaps... I had this application shared through another computer, however since I was redoing that computer I was hoping to find a way to remotely share applications.

6. Remote Desktop - As I am not linux-fluent, I would need the gui for somethings, as I would not be able to accomplish everything from the command line.

The following programs were eventually used on my Debian server:
1. Subsonic - since this is Java based it works on pretty much anything. The first install went without any errors, but did not appear to work. Purging the installation and reinstalling worked... not sure what went wrong. As well, I had to change the ownership of some of the files, to root ownership.. my default logon was throwing up permission errors. However, once that was corrected, subsonic was up and running very well. The next thing I had to do was get it to start on boot. By adding the following line to /etc/rc.local "/var/subsonic/standalone/subsonic.sh" Subsonic will boot on startup... rather easy compared to some programs rather long startup scripts.

2. Deluge - Bittorrent was eventually taken over by Deluge. This was a rather difficult one... I originally went for Transmission.. I then realized I wanted something with a Webui. Transmission was said to work with something called Clutch. However, I was unable to get that working. From there I turned to Deluge.. however, the debian repositories appear to be very out of date, they only had Deluge .5. I downloaded Deluge version 1.1.9, and after MANY struggles with dependencies for compiling and installing I finally got it up and running. The only complaint I have is that RSS feeds cannot be managed from the Webui.

3. Hamachi - Hamachi was rather easily installed, however there is one error that occurs when starting.. for some reason the tuncfg command is not run... I believe this is a permissions issue, and is something that needs to be changed with my startup script. As well, there seems to be problems connecting my windows 7 laptop to my server using hamachi; the hamachi connectivity is sporadic. I am currently looking into another solution.

4. Apache2 - Apache has been replace by Apache2. The installation was once again, very easy on debian, sudo apt-get install Apache2. There has been a change with apache2. You now edit the apache2.conf file instead of the httpd.conf file. It is my understanding that you can add lines to the (empty) httpd.conf file and they will be applied. All I did was copy my backed up web files to /var/www and replace the index.html, and I was once again up and running.

5. Freemind - Freemind was easily installed on debian, and worked exactly as it did on windows.

6. NxServer - I originally tried VNC viewer, but VNC was unable to run the server headless.. or at least I was unable to get it working. So I installed nxserver, and installed nxclient for viewing. NOTE: Once I installed xfce4 for the desktop manager, then I was able to use X11 forwarding to forward the desktop to the windows machine.. more on this in another post.

Extras:
1. Webmin - Webmin is an amazing web-based administration suite for linux. A simple install and you can connect via port 10000. Webmin has many advanced options for managing your server, from apache2 configurations, to Samba configurations, all on a nice web-based interface, as shown below.


Essentially, I was able to replace my windows server with alternative software.. now it was much more difficult to get up and running, since I was quite inexperienced with Linux, but now that it is up and running, it runs much quicker than my windows box was running.. although most of that is due to the fact that I am running the server "headless". Below is a video detailing some of the installation.


At this point, the server is up and running... I have not run into any unexpected problems (once I got everything running strongly, when first configuring I ran into a lot) but there are a few kinks to work out still, especially with X11 forwarding.


Wednesday, August 19, 2009

Windows 7 x64

So I was at my friends house and decided to blow away my Ubuntu partition and install Windows 7. Shocking, I know.. what prompted my decision to give Ubuntu the boot? Well, the unfortunate issue was that I was not able to sleep or hibernate my laptop. Or, more accurately, I was able to sleep or hibernate... I was just unable to restore my computer from sleep or hibernation, I was forced to reboot my computer every single time. As much as I love Ubuntu, this was not a situation I could handle. I was unable to resolve the issue, so decided to go Windows 7.

As for x64... I chose that because that is what was available. I may switch to 32 bit in the future, as that works out better for me. For example, neither of my x64 machines are able to access TS Webaccess for remote apps from Server 2008... because you need to have service pack 3 installed. Service Pack 3 is.. you guessed it... only available for 32 bit versions of Windows. Which is a slight disappointment, but you can always publish the remote apps to a share and access them that way, which works out rather well.

My overall impression of Windows 7 is a good one. Just enough eye candy to make it look nice, yet still responds quite snappily. One of the new features I noticed that I hadn't heard about (not that I've really done a lot of research into Windows 7 features) is homegroup. Essentially, it's "My Shared documents" except that it makes it very easy to set up... cool.. but not a feature I would ever use considering I'm a network security major. Now here's where my idea comes in.. (Microsoft, I hope you are listening) create a nice button called "Customize my Windows Installation" which will allow you strip out everything you don't need in your Windows installation. If you allowed someone to knock some money off the price if they removed that feature... that would be awesome.

Other than that, I wasn't blown away by Windows 7, but I also wasn't pissed or bored about it either. I do miss my Ubuntu... but until I can safely put my laptop to sleep.. it will remain off my laptop.

Wednesday, June 17, 2009

Sharepoint Server 2007 on Server 2008

I love MSDN. I recently attained a copy of Server 2008 and Sharepoint Server 2007 from MSDN, and have installed them both on one of my computers. Initially, there were several problems getting the default ISO to install, due to compatability issues. Server 2008 (which was apparently designed to give helpful but useless information for EVERYTHING you do) automatically pops up and informs you that it is not able to install Sharepoint because of compatability issues. A quick google search turned up this page, which gives a very useful step by step on how to solve the problem. The installation and configuration of Sharepoint takes a rather large chunk of time. Once you are done "installing" Sharepoint, you have to (at some point) run the configuration wizard, shown below.

Now, to run sharepoint, you need to have IIS enabled. I already did have IIS installed and enabled, so that I could run Remote Apps on my terminal server. (That is another story.) However, this brings me to my next point, which is that Sharepoint does not integrate very smoothly with any existing web sites or web applications. Below is a picture of IIS after sharepoint has been installed. You will notice that the web site that I had previously set up (For my Remote App website) was immediately disabled to open the port for SharePoint. I switched to a different port for my TS website, and everything worked again. Now SharePoint is up and running with the default configuration.


As usual, the default configuration is not enough to make me happy. The SharePoint Server runs great on the internal network, by entering http://computername/ but thats kind of pointless to me. If I was a large company, this might be enough to satisfy me, but to me its quite worthless. I want to be able to access my files from any web browser, anywhere. Technically, since I run Hamachi on all of my computers (and portably from my USB stick) I could do a rather ingenious workaround. I could bind the websites to my Hamachi 5.x.x.x IP (and hope nothing broke.. shouldn't be a problem) and access the files "from the Internet" that way. However, that wouldn't be the elegant, flawless solution I am looking for. Fortunately, SharePoint allows you to configure mappings for external access. Go to your Central Admin Page. (Check your start menu for a shortcut, or check IIS for the port and manually enter it into the browser.) From the main page (shown below), there is a list of common startup tasks that need to be done.

Go to Application Management -> Create or Extend Web Application -> Extend an existing web application. Once you enter that page, you will need to select an existing web application. Select the one that is already mapped to port 80. Next, type out a description for your site. Type your external URL into the host header, and copy-paste that into the URL section at the bottom of the page. Finally, change the zone to Internet. Done!

To check your settings, go to Operations -> Alternate Access Mappings. You should see your URL listed.

One last thing that should be done is to configure Excel Services. Excel Services determines how xlsx files are handled when they are opened in a web browser. Excel Services can be managed from Shared Services. Open Excel Services Trusted File Locations. Most of the options are self-explanatory.

That should have all of the basic options configured for your Sharepoint Server! Next time a slightly more in-depth tutorial will be covered.

Saturday, June 13, 2009

Freemind, Apache, IIS 7.0

Recently, I moved my website away from Apache running on Windows XP Professional, to a slightly higher powered Windows Server 2008, using IIS 7.0. Unfortunately, the switch to IIS 7.0 was not an easy one in the least. Apache was a little difficult to pick up originally, but at least almost ALL of the configurations were stored in a central text file that could be easily edited, and was highly configurable. As well, you installed Apache, (and PHP 5) added extensions in the httpd file, repointed the home directory, and a few other minor configurations (.htaccess for example) and it just worked. With IIS 7.0, that is another story. Attached is a picture of the error I get whenever I try and load a mindmap.

If anyone knows what the problem is, feel free to comment. This next picture is how the Mindmap is supposed to look.
In IIS 7.0, I added a MIME type for .mm files "application/freemind" (I think), which had no effect as well. When I edit the .html file to point to the mindmap as a local path, and open the mindmap on the local machine, everything works fine.

In the end, I was forced to install Apache and IIS 7.0 on the same machine, and use Apache for that site, and IIS 7.0 for my sharepoint site.

I am hoping that in the near future mindmaps will be able to be edited entirely online. This will allow for easy viewing and editing from any web browser, using the power of Java. I am currently looking into publishing Freemind on my Remote Apps Terminal server, which will allow me to connect via a web browser, run the remote app, edit the map, and save it again. Certainly not the ideal solution, but it is a solution that works.

Thursday, June 11, 2009

MCSA - 70-290

Yesterday I headed back to my old school, Davenport, and took the 70-290 exam, Managing and Maintaining a Windows Server 2003 Environment. I took it now for two main reasons. 1) The second chance option is available. If I fail it the first time, I get a second chance. 2) The exam was on sale, which brought the price down to 90 dollars. As it turns out, I didn't need to worry at all. Unfortunately, the 70-290 exam was very easy. Many of the questions were very basic, and did not go in depth at all. As well, there were only 44 questions on the exam. The simulations were better, they at least covered multiple areas, and simulated real life problems, yet even so, they were not very difficult either. The required score to pass was a 700. I got 880, and finished quite quickly. I will start studying for my 70-291 exam (which promises to be a bit more difficult) starting next week.
My next exam will most likely be the Vista client exam. I believe that combined with the Security+ exam, I will have MCSA 2003:Security status.
Next, I will either continue on to get my MCSE for 2003, my Network+ and A+ certifications, or attack my CCNA certification.